The Best Clip-On Guitar Tuners in 2022

There are different types of guitar tuners, and one of those is the clip-on tuner. Clip-on tuners clip onto the headstock, and they function by picking up the vibrations from the strings of your guitar. After extensive research and testing, here are the best clip-on guitar tuners on the market to help you find the right one for your needs.

1.     TC Electronic PolyTune ClipTC_PolyTune_Clip

TC Electronic PolyTune Clip is one of the best clip-on tuners. The polyphonic tuning mode allows you to play all the strings at once, and you can see which lines are in tune or out of tune. The design is excellent, and you can also switch modes between poly-tune, stroke, and chromatic. Whichever method you choose, it will always guide you to a perfect pitch. It contains the most advanced tuning technology and high-quality components that can complement your instruments. It is not the cheapest, but it is unquestionably worth your money. Check price on Amazon

2.     D’Addario NS Micro Tuner 

D’Addario NS Micro Tuner is one of the cheap clip-on tuners but still has high quality. A 360-degree adjustment sees the LCD screen easier as you play your guitar. It is small and lightweight but can work with various string instruments, including electric guitar, acoustic guitar, bass guitar, mandolin, and banjo. It is also one of the most in-demand tuners, with a high rating of positive feedback. Ideal clip-on tuner for you if you want something simple and inexpensive. Check price on Amazon

3.     The Korg AW-OTG Clip-On TunerThe Korg AW-OTG Clip-On Tuner

The Korg AW-OTG Clip-On Tuner has an impressive display and different tuning animations. It has a chord finder function recommended for those adventurous guitarists who want to find new chords and voicings on their own. With just one AAA battery, you can play continuously for up to 18 hours. A bit pricey but with very high accuracy. Being in tune is very important, and Korg can help you with that. Check price on Amazon

4.     Snark ST-2 Super Tight TunerSnark ST-2 Super Tight Tuner

Snark ST-2 Super Tight Tuner has been one of the trusted names for guitar tuners because of its outstanding performance. You have an option of either a mic or a vibration sensor. Its screen is bright, easy to read, and angled for good visibility as well. This is a low-cost clip-on tuner that will undoubtedly please you and your listeners. Check price on Amazon

5.      The Peterson StroboCliptuner peterson

The Peterson StroboClip is one of the most accurate clips on tuners and is used by many well-known professionals. It is highly accurate, with a 1/10 cent accuracy. With little hassle, this clip-on tuner can work with acoustic guitars, electric guitars, ukuleles, dobros, banjos, and mandolins. Besides, its features also have a capo setting, where guitar players can quickly tune their instruments between live performances. If you are a professional guitarist, it is worth investing in high-quality clip-on tuners like the Peterson StroboClip. Check price on Amazon

6.      The Boss TU-10 Tuner

The Boss TU-10 Tuner

The Boss TU-10 Tuner has proven its dependability and quality. It is a compact, lightweight, easy-to-use clip-on tuner. Recommended for many guitar players, from beginners to intermediate levels. It also has a flat tuning mode which allows you to tune down up to five semitones. At an affordable price, you can have a well-designed, practical, and user-friendly clip-on tuner. Check price on Amazon

7.     KLIQ UberTuner

KLIQ UberTuner

KLIQ UberTuner has one of the best tuner performance value clips. Because of its enhanced microprocessor, it delivers accurate readings that give fast and precise results. You can surely use it for years because of its solid components and durable design. Apart from its awe-inspiring display, it is also a highly adjustable device with a 125-degree tilt and 360-degree turn option that is comfortable for guitar players. One of the lightest tuners, making it very portable and convenient.  Check price on Amazon

8.     The Snark SN-1X

The Snark SN-1X

The Snark SN-1X is also one of the best guitar tuners because it is simple to use and inexpensive. It is small and very portable and can be clipped into the headstock of any guitar. It is highly adaptable and can be rotated by 360 degrees, providing the player with an excellent view from all angles. This device is suitable for guitar and bass because of its frequency range. Check price on Amazon

9.     The Mugig Clip-On Guitar TunerThe Mugig Clip-On Guitar Tuner

The Mugig Clip-On Guitar Tuner works with guitars, basses, violins, and ukuleles. It has an automatic shut-off function and will turn off automatically if there is no operation and no signal is detected for three minutes. It has a flexible rotation design that can rotate 360 degrees and can be bent 135 degrees. Equipped with five tuning modes for your different instrument tuning needs. This device ensures you get a quick and accurate tune. 

10. Nordic Essentials Guitar TunerNordic Essentials Guitar Tuner

Nordic Essentials Guitar Tuner. This clip-on tuner can work with different instruments, such as guitars, violins, ukuleles, banjos, bass, and mandolins. It is portable, easy to use, and lightweight as well. It has high precision and a sensitive vibration clip that allows you to tune even in a noisy environment. This guitar tuner is indeed a must-have accessory for you. Check price on Amazon

Conclusion

As a guitarist, you will always want to keep your guitar in tune. A tuner is an essential guitar accessory to have if you want to keep your guitar sounding great all the time. The most popular type of tuner is the clip-on tuner because they are easy to use and very convenient. In addition, one advantage of clip-on tuners is they are small, and you can leave them clipped onto your guitar to make quick adjustments as you play. Keep yourself satisfied with a perfect tune and let your audience enjoy your music.

Author Bio: 

Curtis Dean writes on behalf of Sage Music School where they give online music lessons based on the science and research of the psychology of learning. Their effective teaching methods create confident and capable students who enjoy the happiness of making music.

The Best Guitars for Playing Jazz

Everyone has got their own opinions about which guitars are best for a given genre. Players in jazz music have historically used all kinds of guitars including solid body, hollow body archtop, and semi-hollows. Some have even preferred to go the way of nylon string guitars, although this camp is much smaller. Today, I would like to discuss what I consider to be the best for jazz in terms of electric guitars. Of course, these are some of my personal favorites and it is important to look through options for yourself.

Gibson ES175gibson-es175


The Gibson ES175 is often the first choice for many jazz guitar players. Historically, many players from Wes Montgomery to Pat Metheny have used this guitar and it is no wonder why. With its nice round tone and its incredible playability, it has been a favorite for so many jazz guitar players over the years. If you like to play with high gain, however, this might be not be the best option for you. These guitars also tend to be a little bit expensive. 

Gibson L5gibson-l5

Much like the ES175, the L5 is a rather expensive guitar. It’s also fully hollow so it makes a great guitar for jazz, but it is not very versatile. With that said, you would have a pretty tough time trying to find a better jazz guitar than this one. This guitar offers a nice warm sound with punchy mids and has been played by guys like Pat Martino, Wes Montgomery, and even more recent players like John Mayer.

Gibson ES335gibson-es335

Personally, this is one of my favorite guitars out on the market. For a long time, this was the best semi-hollow out there and it’s no secret why. It offers great tone, wonderful playability, and it tends to be a bit more versatile than some of its hollow body counterparts. Because it is semi-hollow, it can handle higher gain situations but it can also provide that wonderful jazz tone we all know and love. That is a win/win for me as I love to solo with a touch of gain. Some notable players are John Scofield, Emily Remler, and BB King.

Fender Telecasterfender-telecaster

Telecasters are great and extremely versatile guitars. They can handle anything from country to rock and, yes, jazz. In fact, guys like Ed Bickert and Ted Greene have sworn by these. It is easy to see why so many companies have taken this model and made their own versions of it. The great thing about solid bodies, too, is that they tend to be a bit more affordable than their hollow body counterparts. While hollow body guitars can easily run $4000+, teles and strats can go from $200 for beginner models to $3000+ for some of the higher end stuff. There are plenty of pricing options available which is great. Check price on Amazon

Fender Stratocasterfender-stratocaster

Much like the telecaster, these guitars have a range of pricing options. Also, much like the telecaster, they are extremely versatile and have been copied by other guitar makers for years. Often known for its blues and rock reputation, Fender Stratocasters can handle jazz, fusion, and more just as easily. Tonally, they can offer the classic “strat spank”, but you can also get a nice warm sound if you roll off the tone knob just a bit and, suddenly, it’s a great jazz guitar! Check price on Amazon

Ibanez AF95Ibanez-AF95

If you absolutely must have that box-y hollow body tone but cannot afford to shell out upward of $3000, this is a great alternative. These Ibanez guitars sound great, play great, and can do the job! I won’t say they are as good as their more expensive counterparts because I would be lying, but if you really want that hollow body sound for less, these are a great buy. I have seen them run between $500 and $750 on the market. As with the other hollow body models, it mostly lends itself to straight-ahead jazz and does not really handle high-gain situations well. Check price on Amazon

Sadowsky SS-15Sadowsky-SS15

Having only recently learned about these, I must say I was incredibly impressed when I finally got to play one. Immediately, I fell in love with the tone shape and the playability. It has a wonderful mid-range punch while also providing that classic “box” sound. This is another one of those guitars that tends to fall in the higher price range of about $5000, but I really think this is worth every penny. It has a slimmer body which really gives it a very unique tone color as opposed to some of the bigger hollow body models that Gibson and others make.

D’Angelico Excel EXL1dangelico-exl1

Here is another great option for those looking for more affordable but still high quality options for hollow body guitars. This model has one SH Johnny Smith Mini-Humbucker in the neck as that tends to be the sound most jazzers go for anyway. In addition to sounding great, it is very comfortable and plays wonderfully. As a quick note, I would also like to recommend their very popular semi-hollow models such as the Kurt Rosenwinkel signature. Check price on Amazon

Eastman AR910CEeastman-ar910ce

Eastman archtop guitars have gained significant popularity in recent years and it is easy to see why. They also offer wonderful guitars for a more affordable price. While this particular model is more expensive, it is still a bit cheaper than some of the bigger names and is worth every penny. In my humble opinion, these can hang with some of the best “boxes” out on the market right now and this one seems to be one of the more popular models. I was lucky enough to play one recently and I was thoroughly impressed.

In conclusion, I hope these have given you some good ideas for your next guitar. Your choice will all depend on what you need out of it. Whether that is versatility, affordability, or a classic sound is entirely up to you, but it is important that you go into making your purchase with these parameters in mind.


About the Author

Marc-Andre Seguin is the webmaster, “brains behind” and teacher on JazzGuitarLessons.net, the #1 online resource for learning how to play jazz guitar. He draws from his experience both as a professional jazz guitarist and professional jazz teacher to help thousands of people from all around the world learn the craft of jazz guitar.

Empress Tape Delay Review

empress-tape-delay-reviewThis is guest post by Scott Martin

Today’s article will be a review of the Empress Tape Delay.

The effects-obsessed 21st century guitarist is living in an extremely beneficial time in history for those afflicted with their condition. Whatever sonic sauce they are looking for, be it overdrive/fuzz/reverb/phaser/etc, somebody somewhere has (most likely efficiently and inexpensively) made a digital pedal or plug-in of what they’re after at the given moment. As a delay junkie, I find myself both astounded and thankful at the plethora of options available to me. Effects companies everywhere have come up with new and inventive ways to turn an audio signal into a cascading, echoing deluge of ones and zeros – and let’s be honest folks, some of those ones and zeros out there sound extremely good. A good digital delay can be depended on to not only get the job done, but also to be relatively small and inexpensive. And yet, despite all this convenience and economy of space and dollars, some guitarists still find themselves attracted to the halcyon days of a much more primeval era in audio technology.

Ah yes…the fascinating and antiquarian world of tape delays. Since the 1950’s, guitarists have been using these rather quirky, mechanically-based machines to create lush soundscapes and shimmering rhythmic melodies filled with repeats that fade brilliantly into the aether. As the magnetic tape in a unit aged and warped over time, the repeats would get grainier, more “washed out” sounding, and in general, develop very interesting modulation characteristics which, depending on the machine, can be easily identified and catalogued by vintage tape delay aficionados much the same way a wine connoisseur can tell you the important and blatantly obvious differences between say, a glass of Shiraz and another of Malbec.

Not every guitarist may posses the capacity (or desire) to tell the sound of a Roland Space Echo from that of a modern day Boss DD-7, but the difference is there, and some are known to spend thousands of dollars assembling collections of these large, unwieldy, and mechanically fragile units in their studios. Unfortunately, bringing them to the gig is, at best, impractical. The effects pedal industry has taken notice of this dilemma, however; and a veritable legion of tape-delay based analog/digital hybrid pedals have since been released in order to feed the need for guitarists everywhere to sculpt their sound with the mojo of these revered and ancient units. Of these, the Empress Tape Delay is a personal favorite of mine and the one which I will be reviewing today.

Empress Tape Delay Review

A little background: in 2008, Empress Effects of Canada released a phenomenal delay pedal known as the Superdelay, which was later released as a “Vintage Modified” edition in collaboration with the folks at Pro Guitar Shop in Portland, Oregon. The Tape Delay section of this unit was so popular that in 2013, Empress released it as a standalone unit. With space for three user presets, tap tempo, and the ability to control several unique delay parameters, the Empress Tape Delay is a monster of a pedal in a relatively small box. Also particularly noteworthy is the Tape Delay’s incredible 103db signal-to-noise ratio, which means that not only does it sound absolutely fantastic, but it is extremely quiet as well.

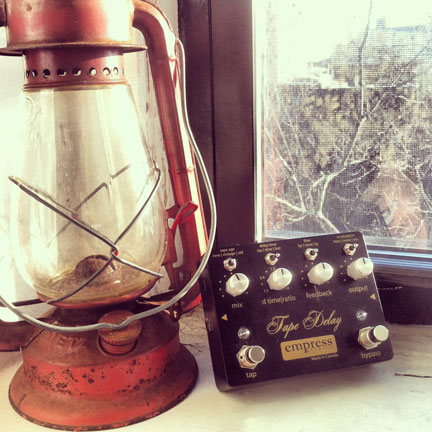
To begin, the Tape Delay is, without a doubt, one of the most aesthetically pleasing effects pedals I’ve ever seen. Housed in a sleek black enclosure and adorned with gold lettering and silver hardware, it resembles a piece of high-quality outboard gear from the Golden Age of Recording. Four knobs controlling “Mix”, “Ratio/Delay Time”, “Feedback”, and “Output” stand in line on the face of the pedal, while positioned above them are a series of micro-toggles for “Tape Age”, “Delay Time”, “Filter”, and “Modulation”. Both “Bypass” and “Tap Tempo” are controlled by two generously-spaced momentary switches, making it quite easy to tap in the proper tempo when syncing your delay up.

Fairly simple looking on the surface (four knobs, four switches), the Empress can actually be configured to operate in two modes – Tap (which I will refer to as “Standard mode”) and Preset.

Empress Tape Delay Presets

PART I: STANDARD/TAP MODE:

In Standard mode, the Empress provides a very straightforward delay experience – every control functions as labeled and you are easily rewarded with some of the richest sounding delay I have ever heard out of a pedal. I’m talking the kind of delay that you turn on and the engineer asks you “What is THAT?!” To note: even with the delay mixed out of the signal entirely, running into this box just makes your guitar sound BETTER, which reminds me of using an Echoplex EP-3 pre-amp. But if you’re looking for delay (and that’s why we’re here, right?), it really is straightforward. Set your output at “noon” for unity gain, mix to two o’clock for repeats that (for me) sit perfectly, and with the “delay time” switch set to “tap”, tap your tempo in and adjust the “Ratio” knob for the desired rhythmic effect. Keep that Feedback knob below three o’clock or things might get a little hairy (The Empress can swell/self-oscillate and does so beautifully if allowed) and just start playing. Play “Where the Streets Have No Name”, play “Run Like Hell”, play “She Sells Sanctuary” – whatever works for you. It all sounds glorious.

You can spice things up a bit by engaging the top row of toggle switches. While “new” tape sounds clean and bright, switching over to “vintage” adds a little “wow and flutter” to the repeats, along with some darkness and grit. Flip it to “old” and things get even darker and dirtier, somewhat lo-fi in character. An even larger amount of modulation is introduced to the signal, and all of this conspires to give the Empress a feel and sound reminiscent of a vintage unit which has been used and abused (widely translated as “loved” in the topsy-turvy world of Rock n’ Roll).

Tap tempo is the quickest to use, and the dedicated momentary switch will input your tempo as the average of your last four taps. You can then adjust the Ratio knob from 1:1/3:4/1:2/1:3/1:4 (Quarter/Dotted Eighth/Eighth/Triplet/Sixteenth) relative to the speed of your tapped tempo.

Should you wish to get more hands on with the timing of your repeats, set the delay time to “fast” or “slow” and spin the Ratio knob clockwise/counterclockwise until they land as you wish.

The “Filter” toggle (inactive in center position) will give you a hi-pass filter on the left, attenuating frequencies below a certain threshold, essentially acting as a “bass cut” for your delayed tone. To the right, you are given the polar opposite of an equally effective low-pass filter, cutting highs and making for a darker sounding delay. Utilizing either of these can really help tailor where the Empress’ syrupy-sweet repeats will sit in a mix.

Lastly, on the far right you are given a “Modulation” option. This adds a somewhat chorus-y character to each repeat, and you have a choice between “little” or “lots”. It can, of course, be disengaged with the switch centered, just as the previous “Filter” toggle.

Now, you might think at first that both “filter” and “modulation” are redundant options, given that Tape Age tends to add a little of each of these anyway – but the switchable quality of both these parameters means that you can have a clean, bright, new tape with your choice of modulation level and frequency response, without the graininess or grit of “Old” or “Vintage”. There’s a lot of possibilities. Take your time and enjoy learning them.

empress-tape-delay-review

PART II: PRESET MODE/ADVANCED CONFIGURATION

If that was all there was to it, this would already be a well-regarded pedal and one worth writing home (or a review) about. However, the folks at Empress did not stop at “Standard” mode, but also gave us “Preset Mode”, accessible through the “Advanced Configuration”, a somewhat roundabout yet very clever mechanical routine. Seeing as we don’t all require (or desire) LCD screens on our pedals, this is a great feature and no more difficult to set up than mastering the cheat code to “Contra”.

The Tape Delay ships with Presets disabled (there is room for the pedal to store three of them) and with write-protection (i.e. locked presets) off. In order to utilize the full potential of this pedal, you can enter the so-called “Advanced Configuration” mode and set the Empress up for dual operation.

Entering Advanced Configuration requires unplugging the power from your pedal, then plugging it back in while holding down the “Tap” and “Bypass” switches at the same time. You’ll know you’ve done this correctly if the LED on the Bypass switch blinks twice. From this point, you can use the toggle switches to set presets, bypass type, “blips” and preset write-protection. The Tape Age toggle controls the number of presets that can be stored (left; none, center; two, right; three), and true bypass vs buffered bypass is controlled via the Delay Time toggle. Buffered bypass allows for delay “tails” to spill over into your dry signal once you disengage the pedal, allowing for a less jarring transition and a more natural feel to the end of a delayed guitar line. The Filter toggle controls “Blips”, a function which alters way the pedal reacts to the changing of delay times on the fly, allowing for some crazy tape-head inspired sounds as the Ratio/Delay Time knob is turned.

On the far right, the Modulation switch gives you the option of write-protecting your presets. What this means is that once you exit “Advanced Configuration” and begin to create/use presets, they will always revert to their saved form each time they are called up. If you hit a knob or switch accidentally during a performance or feel the need to adjust things in order to “tweak” on the fly, the loaded preset will temporarily change to reflect those values, but they will be safe and sound in their original form for the next time you need them. Conversely, if you feel the need to adjust or edit them permanently, you will need to re-enter Advanced Configuration and disengage write protection in order to accomplish this. I found this to be the only reason I found myself returning to Advanced Configuration, as there have been times where I’ve needed to change my presets rather often.

Once you’ve enabled presets and adjusted parameters in the Advanced Configuration mode to your liking, you can exit by holding down the Tap and Bypass switches, returning the pedal to its normal operating mode. From this point forward, setting the delay time to “Tap” will have the pedal in Standard/Tap operating mode, while setting it to “slow/fast” will put us into preset mode. Once in Preset Mode, your three presets are accessed and controlled by the Tap footswitch (effectively rendering it useless). Hitting the Tap footswitch will cycle through your three presets, each sporting a different color LED – Red, Blue, and Amber.

The one thing about the delay that I could not figure out from reading the manual was how to actually create and edit a preset. I understood how to enter and exit Advanced Configuration, but I had no idea how to actually save or create a preset once I was back in Preset Mode. As it turns out, it was extremely simple, but it took me quite a few frustrating minutes to stumble upon the answer.

In order to create/save presets, once you enter preset mode and load up a preset (say, #1) all you need to do is begin to adjust your knobs and toggle switches. If write protection is off, the pedal will reflect these changes and you can tweak to your heart’s content. The only negative here is lack of that Tap switch – if you are looking to sync up a delay tempo in a preset, you are going to have to do it the old-fashioned way with the delay time knob and slow/fast toggle. This can take some time to get absolutely perfect, as I found out. Once you have created your desired delay tone, hit the Tap Tempo footswitch to cycle to the next preset, automatically saving the one you just completed. Continue this pattern until you have all your presets where you want them, and then enter Advanced Configuration mode once more, flip the modulation toggle to write-protect, exit, and you are all set. Now, switch between “Tap” and “slow/fast” on the Delay Time toggle in order to alternate between Standard and Preset Mode (with your three presets on hand). I realize this all sounds a great deal more complicated on paper than it actually is in practice – it maybe takes twenty or thirty minutes to learn (and memorize) the ins and outs of the pedal.

So, that’s pretty much a wrap. The Empress Tape Delay. Easily one of the best vintage tape-delay inspired pedals out there on the market right now – and one that packs in a whole ton of features along with an incredible auditory experience for a very reasonable price. The Empress may feel a little quirky to some users, especially accessing Presets and Advanced Configuration, but the sound of it is such a winner that once you learn to adjust settings to your liking, this is a delay that may well never leave your pedalboard – it hasn’t left mine (currently, it’s being used in Preset Mode for live performances with Storm of the Century). As stated from the outset, you can plug this pedal in and get amazing and usable delay sounds straightaway, but the true soul of this pedal is not as a simple plug-and-play device. Learn to use it as it was designed and you will be rewarded with a versatile delay, second to none and full of that vintage tape delay mojo that we all know and love. Well-engineered and filled with lush, hi-fidelity sound, the Empress Tape Delay is most certainly one for the ages.

View the Empress Tape Delay on Amazon.

How to get Eric Clapton’s Guitar Tone


This is a guest post by Nathan Pieper

Of the many revered giants in the world of guitar, Eric Clapton stands high. With 18 Grammys, his record 3-time induction into the Rock and Roll Hall of Fame, and being one of the top 5 Rolling Stone greatest guitarist of all time, he is a rarity even among legends, and these are just a few of his extraordinary accomplishments. Before venturing out as a solo artist in the early 1970s, he was involved with several bands including the Yardbirds, Cream, and Derek and the Dominos, and over the years he created or helped create an impressive catalog of some of the greatest songs of all time. From his rendition of the classic Robert Johnson song, “Crossroads,” to “Layla,” and the emotional, “Tears in Heaven”, his genius has shined clear for his entire career.

Throughout his career he developed not one, but many iconic guitar tones, and today we will discuss two. The most famous is his “Layla” tone, but we’re also going to talk about his “Bluesbreaker” tone. These tones have inspired countless guitarists and were forged out of the foundations of tone created by some of Clapton’s own guitar heroes, including B.B. King, Buddy Guy and Buddy Holly.

As a major note before we dive in, we guitar players must remember that achieving the exact, 100% replicated tone isn’t technically possible because we are not Eric Clapton; everyone’s playing differs in some way, no matter how minute the difference. However, we can pull off his foundational tone in a few different ways using a few different pieces of gear. Bear in mind that a person can own an original Les Paul ‘burst or a custom shop Strat and have the best amps and pedals, but if they aren’t a good player then the instrument, regardless of price or quality, will not sound good. Even if Eric Clapton played a cheap knockoff guitar, he would still sound good because he knows how to play it. What I’m saying is that practicing and becoming a good player will benefit you more than the most accurate replica of one of his guitars, or even playing Eric Clapton’s gear.

Eric Clapton Gear

First, we will look into the earlier “Bluesbreaker” sound.

Established around 1963-1964 while Clapton was playing with Cream, he had a few different guitars: a red 1963 Gibson ES-335, a 1960 Gibson Les Paul (later followed by the famous 1957 Les Paul Goldtop painted red and named Lucy), a 1964 Gibson SG, aka the” Fool,” and he played them through a Marshall JTM45 and later, through a Fender Tweed Twin. This setup has become extremely desirable over the years because of its famed “woman tone,” and it’s easier to replicate than you think.

One of the things Clapton has said recently about his “Bluesbreaker” years is that he discovered each JTM45 to have a different sound. He later found the Fender Tweed Twins, an amp he said that, unlike the JTM45, had a consistent tone; that each Twin sounded like the last. Just like he found a different amp to shape his tone, it’s possible to replicate his sound without rare and coveted vintage gear. In order to find it, we are going to discuss a few essential pieces, and it’s not as expensive to create the “Bluesbreaker” sound as you may think.

First, we will discuss the amps to use. Marshall does happen to make a hand-wired reissue of the 1960s Bluesbreaker amp, and they do sound pretty good; you can get one for a few thousand dollars. Fender in the last few years also has created a line of vintage-accurate tweed amps just like their original counterparts, and Eric Clapton himself has a line of Fender EC Tweed reissues. They to are hand-wired, sound good and cost a few thousand dollars. If you can afford one, I would highly recommend getting one of Clapton’s EC Tweed Twins, but if 3 grand is too steep, you do have other options.

The Fender Tweed Blues Jr is one of the most solid AND affordable Fender amps of this era, and with some tweaking you can recreate the tone he so famously has achieved. One of the reasons it’s an affordable option for Clapton’s tone is because of the combination of a volume knob and a master control knob as well. With this you can turn up the amp to get that sweet tube breakup, and if you live in a place where loud noise could cause complaints this 15 watt gem is an essential. You also get pretty dynamic tone controls for that excellent touch sensitivity that is also a major factor in this tone hunt. Another option (that just so happens to be another tweed) is the Fender Bassman Ltd. This lacquered-tweed tone machine is also the amp off of which Jim Marshall based his schematic for the JTM45. It is a solid and beautiful sounding tone giant that goes for about $1500 (much less than the Twin or the JTM45), and it helps bring that extra punch, dynamic range and complexity that will be essential for replicating and fitting the last piece of the puzzle of Clapton tone.

Eric Clapton Woman Tone 

The Gibsons that Clapton played during this period all featured the famous and highly prized PAF humbuckers, and when he played he would commonly start with the volume and tone knobs turned somewhere between 6-8/10s, and then he would move them up and down to create his varying tones. With the bridge pickup he would crank the volume and turn down the tone knob to create a throaty yet very smooth and velvety fuzz-like tone. It was this setup that created his “woman tone,” named so because of it’s beauty and, at the time, uniquely powerful sound. His 1960 Les Paul, ES-335 and “The Fool” and “Lucy” crafted this tone, but the common musician (even many professional guitarists) can’t afford the original amps, much less an original 57 Goldtop or 60 LP.

To access it for yourself without mortgaging your house is entirely possible. Many of the modern Gibson Les Pauls and SGs come equipped with Burstbuckers or 57 Classic humbuckers, and even if that’s too steep they make both of these humbuckers and sell them separately. Nothing gives more life to an electric guitar than a set of higher quality pickups, and fortunately these American-made Gibsons are great quality. If the Gibsons aren’t cutting it, there are a ton of other classically voiced humbuckers made by different companies, such as Lollar, Semour Duncan, and Klein, and these companies also have pickups for the next Clapton tone we will be talking about today.

Clapton has relied on his Tweed Twins since his “Woman tone” days, but around 1968 he had the opportunity to see Buddy Guy in concert absolutely ripping it on a 50’s Fender Stratocaster, and he soon left behind the thicker “Woman Tone” achieved by humbuckers for his “Layla” tone, achieved by his new favorite guitars, the Fender Stratocasters with maple necks. His most famous Strat is a 1956 beauty called “Brownie,” and this sucker was what launched him through his years in Derek and the Dominos. Around 1970 Clapton began a very successful solo career, and he switched over to a bit of a zebra by taking 3 different Strats and putting the best of each into one guitar, possibly the most well known among the guitars he used through the years, “Blackie.” Clapton has gone mostly with Strats since 1968, although he now uses the Fender Eric Clapton Signature Strat, as he has auctioned off all of the famous guitars we’ve discussed. All of this information is useful for understanding his tone, but now we discuss how to get it.

With his Strats, Clapton would almost always place the pickup selector switch between the 2nd or 4th position. With 3 single-coil pickups (originally he used the stock pickups, then in the mid 1980s he used Lace sensor single-coils with his first Fender Signature Strats, today he still uses the Eric Clapton Signature Strat, but with Fender’s Vintage Noiseless pickups), he would be combining the neck/middle pickups or, more often the middle and bridge pickups. Keeping the volume around 6-8 on this series of guitars is what he would do typically to play rhythm, and because he maintained a relatively small setup (often no more than his Strat, Fender Tweed Twin, and the occasional Vox Wah), his Signature series has a 25dB boost button he can push to get thicker tone for soloing. Bearing in mind that the Clapton Signature Strats are close to $2,000, there are other ways to get his “Layla” and “Blackie” tone.

First grab a guitar with 3 single-coil pickups, like a Mexican-made (or even a Squier) Strat. Now it would be good to install some better pickups, like the Vintage Noiseless pickups in Clapton’s guitars that are made by Fender, or Lindy Fralin’s Real 54s or Blues Specials are also good choices. The Fender Tweed Blues Jr and Bassman Ltd are still good amps (he has stuck with the Fender Tweeds for a long time), and the Blues Jr’s have fat switches that do a good job to replicate the boost switch in the Signature Strats. Another good way to get that boost us by using a pedal. Electro-Harmonix has an LPB-1 linear power boost pedal that does a great job mimicking Clapton’s boost, as does the JHS Mini-Bomb Boost. You can also try out the Boss BD-2 Blues Driver, or if you’re going for a super high quality transparent overdrive that can also be used as a boost, go the route of the JHS Morning Glory overdrive.

When it comes to mimicking Eric Clapton’s tone, there is a lot of gear out there that can help you pull it off. Just remember that each person has something that makes their tone unique. No matter if you’ve been playing guitar for 5 months or 50 years, it is important to embrace the individuality that shines through in all guitarists, and to keep up the practice. You never know, someday you could be approached and asked how to replicate your tone, just like Eric Clapton! Until then, play on!

How to get a Surf Guitar Tone

Looking for some surf guitar tones? You’ve come to the right place. Today we will talk about how you can achieve that dripping wet surf tone that will make you feel like you are riding waves in California. There’s really nothing quite like it. The sound alone makes you want to put on your sunglasses and float to the sounds of the ocean. It really does actually sound like the ocean somehow, especially when you have a good drummer who can stay on that ride. So lets get into it, here’s how you can achieve a good surf guitar tone.

Reverb

Perhaps the biggest piece of the puzzle for a surf guitar sound is having a good reverb to your tone. It is what gives you that ‘wet’ sound. But since there are so many types of reverb on the market, I will make it really easy for you. The one you want is spring reverb. The reason for this is that this was the type of reverb used by all of the surf bands in the ’60s.

surf guitar toneIf you want pure authentic surf sounds, then the only way to achieve is with a real outboard spring reverb tank. The best one out there is a Fender Reverb Unit. These units feature a spring tank and real tubes. Today, Fender has made a ’63 Reissue Reverb Unit which is pretty good compared to the original that came out in the ’60s. If you spend an extra 30 bucks on NOS tubes for the reissue, it can actually sound amazing! I have one myself and cannot use anything else when I want to go surfing with my guitar. The Fender Reverb Units retail for about $699, and while expensive, definitely worth it. And if you don’t like it, you could sell it used for almost what you paid for it. Check out the Fender Reverb Unit on Musician’s Friend.

The next best thing to an outboard reverb unit is an internal spring reverb found in Fender amps. Vintage blackface and silverface Fender amps (from the ’60s and ’70s) have really good sounding reverb tanks. Many bands actually just used these amps to achieve their surf sound. So you can get a pretty good sound, but not nearly the amount of adjustability that the outboard Fender Reverb Unit offers. When it comes to modern production amps, their onboard reverb is decent for surf, but not great.

Finally, the last way to reverb if the above two ways won’t work for you is to get a reverb pedal. However these are digital pedals, meaning they are trying to digitally emulate a real spring reverb. The truth is that they’ll never sound authentic because they are a reproduction and a digital circuit brings a lot of shortcomings. One of which is that digital tries to make things too perfect. What makes a real reverb great are their imperfections and their unique interactions to every way you attack your guitar. So with digital, you won’t get authenticity and it will never get that true surf tone. That being said, many of these pedals have a lot more flexibility and dials to get all kinds of different tones. As well, these pedals have options to do other types of reverb other than spring, such as plate reverb. If you want to take the reverb pedal route, check out our list of the best reverb pedals on the market.

Surf Guitar Amp

Without a doubt, the best surf guitar amps are Fender tube amps, particularly vintage ones. The cream of the crop would be the Fender Showman as used by the legendary Dick Dale. But many different Fender amps will get you there like the Twin Reverb, Deluxe Reverb, Super Reverb, Pro Reverb, Vibroverb, etc. However, I’m getting a good surf tone out of a Vox AC-15.

When it comes to surf guitar amp settings, its all about dialling in a good clean tone. Pushed cleans work as well, which is a clean-ish tone but has some gain to it so it is more touch responsive. I personally like to set my treble pretty high and then wash it out with a good amount of reverb so it isn’t too bright. But other times, I like there to be less treble for a real low analog type tone. Best thing to do is to set your reverb to taste and then adjust your amp’s EQ to suit.

surf guitar toneSurf Guitars

The last piece of the puzzle in great surf tones of course is the guitar itself. Fender makes great guitars for surf with one of the most popular being the Fender Jaguar, followed by the Fender Jazzmaster. Both have been used by countless surf guitarists. Also the Fender Strat will do an excellent job as well.

Aside from Fender, other great surf guitars are made by brands such as Mosrite, Murph, and Vox. Basically what you are looking for is a guitar that can get ultra-clean. Single coil pickups definitely help.

Then there is the 12-string electric guitar. This will get you some incredible surf tones. Allah Las, a surf band of today, uses a Murph Squire 12-string guitar to achieve some of the surfiest tones I’ve ever heard. I personally use a Rickenbacker 360-12 and when paired with my Fender Reverb Unit, the surf tones I get are incredible.

Surf Guitar Technique

Once you have all the equipment, you still won’t quite get there without having the technique down. Part of the sound is playing the guitar in a certain way. For example, many guitarists complain that they can’t get that “drip” sound. But in order to really achieve this, you have to palm mute the strings and pick individual notes. So definitely play around with palm muting. Another technique is tremolo, which is sort of like shredding but not quite. Basically you are picking the same string back and forth very quickly. If you do this while palm muting, you’ll sound just like Dick Dale.

Another amazing surf guitar technique definitely falls into the territory of psychedelic surf. If your guitar has a whammy bar, you can do some very surfy stuff by lightly using the whammy on chords. But do it very lightly and you’ll be rewarded with chords that bend into tune. Very surfy!

So I hope these suggestions help you achieve the wettest, drenched, and wavey surf guitar tones you can find!

Paul Reed Smith Custom 24 Guitar Review

This is a guest post by Cailyn Lloyd.

PRS Custom 24 Review

PRS Custom 24 Review
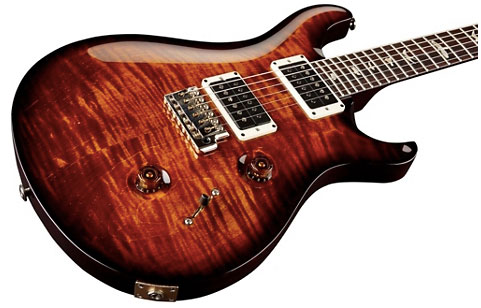
As guitars go, the Custom 24 is virtually perfect. This guitar, introduced in 1985, is Paul Reed Smith’s signature guitar now available in a 30th anniversary model that does not differ much from the original. The only problem with the Custom 24 is the price tag, which for most players represents a major investment or is simply out of reach. However, if you are serious about your craft, your tone, your sound, a guitar like the Custom 24 is an essential element of your gear line-up. If your budget is limited, the good news is that PRS has now made the Custom 24 available in their SE series. I haven’t played one but the reviews online are very positive and emphasize this is not a cheap Korean guitar and that no shortcuts have been taken in production.

The Custom 24 as the name implies is a 24 fret model spanning two full octaves (they also make a Custom 22). The neck comes in two shapes, pattern thin and pattern regular and the difference between the two is something you really must feel with the guitar in hand. (I really don’t know how people buy guitars online!) I play a pattern thin, which fits my hand size perfectly and is very conducive to faster play and shredding. For rough comparison, the pattern thin is narrower than a Les Paul but a shade thicker than a R-series Ibanez.

PRS Custom 24 ReviewThe Custom 24 comes with a choice of pickups, either the classic HFS bridge/Vintage bass pickups or the 59/09 pickups. There are single volume and tone controls and a five-way blade switch that allows the following configurations: bridge humbucker, bridge humbucker with neck singlecoil (in parallel), bridge and neck humbuckers, neck singlecoil with bridge singlecoil (in parallel), neck humbucker. I like all of the positions but gravitate often to the bridge humbucker for the hot fat tone the HFS pickup puts out. One of the great features of this guitar is the ability to dial the volume down a notch or two and still have the bite of full volume. On the other hand, I’ve seen some reviews that compare the neck singlecoil to a strat and while they sound similar, I wouldn’t call it a strat sound. For that tone, I have a maple neck strat! Just a note, the Custom 24s built prior to 2011 have a 5-way rotary switch not a blade switch–probably the only design flaw in the earlier models–I find it awkward to use on stage.

The guitar is fitted with a single piece bridge and whammy bar (with a simple handle that can be inserted or removed in seconds) that is very functional and unremarkable except that it works very well. The bridge is also fitted with multiple fine tuning elements to adjust string height and intonation.

Besides the stunning craftsmanship, there is another brilliant feature exclusive to Paul Reed Smith guitars and that is the “locking tuner” machine heads. Changing strings with these tuners is a two minute breeze, not ten minutes of tedium. You pull a string through the post, tighten the set screw and tune the guitar. Slippage is zero and the tuning is very stable once the strings have stretched. String breakage with this guitar is exceptionally low, even with rough live play.

Nothing is spared in wood, color, and finish–this guitar is beautiful to behold. Without fear of exaggeration, the Custom 24 is really the best factory-made guitar in the world, in looks, in sound, in playability. This has been my go-to guitar for ten years and I do not see that changing. Hope this PRS Custom 24 review is useful to you!

View the PRS Custom 24 on Musician’s Friend.

The Best Boost Pedals on the Market

Best Boost Pedal

This is a guest post by etephen Rose. 

There are times during your playing when you need a little boost. Whether it is to accentuate a solo, cut through the mix, or just add a little heat to your playing. There are a number of great boost pedals on the market and I have selected a few that will give your tone a little something extra.

The following pedals range from well-known brands to boutique ones that you may not be as familiar with. I made sure to consider features for each and include pedals with a variety of price points to cater to every level of player.

best boost pedal - boss feedbacker booster
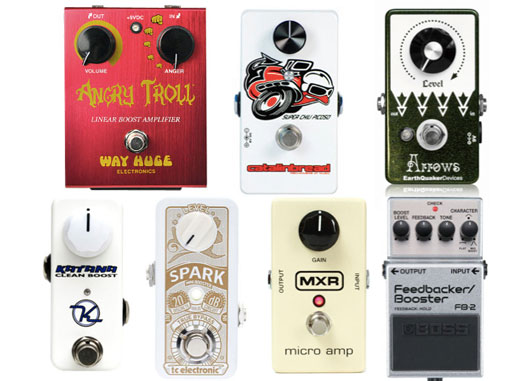
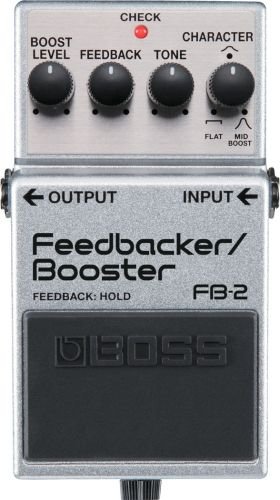
Boss Feedbacker/Booster –This is another fantastic pedal from the Boss lineup. This pedal features the ability to have controlled feedback just by keeping your foot depressed on the pedal for as long as you want the feedback. The pedal features a “Character” knob that allows the player to set the level of boost to either a standard volume boost or some considerable feedback that would make Jimi jealous. The street price for this pedal is $79.00. View this pedal on Amazon.

best boost pedal - Catalinbread Super Chili Picoso
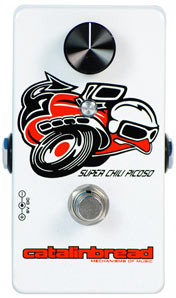
Catalinbread Super Chili Picoso – This is the pedal that put Catalinbread on the map and they have continued to impress ever since. The Super Chili Picoso is a clean boost pedal that allows the player to set the volume level so if you have one guitar that is a low output and a high output there won’t be a volume discrepancy when switching between. This transparent pedal adds up to 35db of boost and should be a considered addition to your pedal board. The street price for this pedal is 109.99. View this pedal on Amazon.

best boost pedal - Earthquaker Devices ArrowsEarthquaker Devices Arrows – This pedal gives your sound that little something extra and improves upon the tonal palette that you have already created. It enhances the clarity of your tone and also removes any muddiness that may occur with some overdriven tones. This one like the Catalinbread, is a single knob button pedal that is easy to use and well-built. The street price for this pedal is $95.00. View this pedal on Amazon.


best boost pedal - Keeley Katana Boost Mini

Keeley Katana Boost Mini – Keeley is known for making great pedals and this one can be added to that list. The Katana Boost doesn’t alter or change your tone at all; it just makes it louder. The versatility of this pedal allows it to be placed anywhere in the signal change depending on what signal you are trying to boost. Because of it’s size, this pedal won’t take up a lot of room on your board and it is also has a single knob operation. The street price for this pedal is $119.00. View this pedal on Amazon.

best-boost-pedal---MXR-Micro-Amp-Clean-Boost-Mini-MXR Micro Amp Clean Boost Mini – Who doesn’t have a MXR pedal on their board already? This pedal is simple, reliable, and doesn’t try to do too much. It will add boost to a clean tone or overdriven amp and can work well with guitars of differing volume like the Super Chili Picoso. There’s a reason why MXR products have been the go to brand for many players during the past few decades. The street price for this pedal is $79.99. View this pedal on Amazon.

best boost pedal - TC Electronic Spark Mini Booster
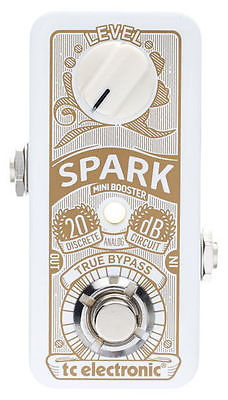
TC Electronic Spark Mini Booster – Here is another well constructed mini pedal that won’t take up a lot of real estate on your board but will have a big impact. The Spark Mini Booster features a 20db boost and “Prime Time” switching that allows the player the option to have it be always on or just to boost a certain aspect of a song. The street price for this pedal is $79.00. View this pedal on Amazon.

best-boost-pedal---Way-Huge-Angry-Troll
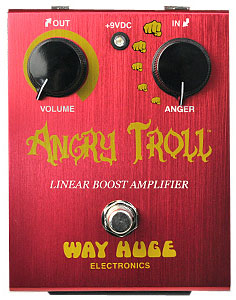
Way Huge Angry Troll – Breaking from the trend of single knob pedals, this two knob booster offers up to 50db of clean gain which is the most out of any pedal on this list. The Angry Troll features an “Anger” knob with five fists of fury that gradually increase in size to indicate the type of overdrive. I have a feeling this is a pedal that you will like when it is angry. The street price for this pedal is $119.00. View this pedal on Amazon.

It’s important when looking for pedals of any kind to find ones that won’t negatively affect your overall tone. The best boost pedal is one that is transparent and helps enhance the guitar tone you already have.

Analog Man CompROSSor Review

analog man compressorThis is a guest post by Sean Murray

Today’s review will be on the Analog Man CompROSSor, which is similar to the Ross Compressor. But first, let’s look at some of the basic features:

JACKS: Right side is input – left side is output. Battery power becomes cut off when input cord is removed, unless you are plugged into the adaptor jack. This is how I use it.

SUSTAIN KNOB: Turning up the SUSTAIN knob will set your sustain and compression. Starting in 2003, Analog Man began using a reverse log potentiometer for the sustain knob just like the Ross and MXR Dynacomp pedals. Better control rains supreme with this little feature.

LEVEL KNOB: This is your volume control.

ATTACK KNOB: The typical/standard setting is to set it at 12:00. There is a notch when you turn up or back to guide you into this position. It is identical to the ROSS and Dynocomp pedals. Turning down (counter clockwise) will kill your attack more (faster attack time) so that there is not as much peak at the beginning of the notes. Or, by turning it up (clockwise) you will get even more attack than a standard ROSS. This gives a nice percussive sound without losing sustain when you are holding a note. Rule of thumb would be to turn this up if you are using humbuckers like I do, to prevent unnecessary squashing of the humbucker pickup sound. Conversely, turn it down to get softer attack.

BIAS TRIM POT: This pot is located on the left/central area of the board. It does not affect the sound except when set incorrectly. Set it to the halfway point, basically horizontal and it should work fine. You can set it more exact by turning the CompROSSor Sustain Knob up all the way. Plug in a guitar and amp. Do not play the guitar but hear the sound of the string noise being amplified fully.

I have tried other brand named compressors, but none of these really provide the rich thickness of tone, distorted, clean or otherwise, that is dealt in spades with this beast. If your desire is something along the line of a fat, warm, smoothed out tone with bottomless depth then this is the pedal you want. CompROSSor also features jaw dropping sustain and unmatched smoothing out of notes. I swear it made me a better player. How?, the fact that I feel more relaxed at the response/sound and tone I am getting, whether or not I am jumping on a note or gently sweeping across a chord. It is best used in front of any distortion or overdrive in your chain. Like all other pedals made by Analog Man, top notch care and quality go into each and every one. Hand selected transistors and a NOS CA3080E chip. Remember, when using ANY compressor, it will go full gain when you have stopped playing or are playing quietly. This is truer when your Sustain knob is cranked. Be sure to turn the pedal off so you do not broadcast noise from the pickups.

In closing, this is a wonderful effect to enhance your tone/thickness/sound. This type of quality does not exist in even brand named pedals. The availability and the price are unmatched. Mike over at Analog Man is a great resource for questions you may have when considering any of his pedals for purchase. Extremely knowledgeable and knows how to treat potentially new and repeat customers. I have been both.

Get the Analog Man 3 knob CompROSSor for your pedal chain and I promise you won’t be disappointed!

TC Electronic MojoMojo Overdrive Review

tc-electronic-mojo-mojo-overdrive-review
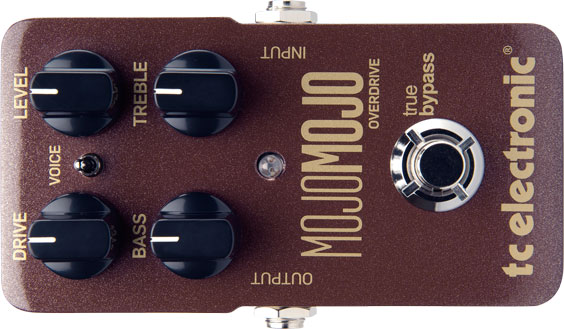
The world of overdrive pedals can be a little overwhelming to say the least. All this talk about tube saturation this, dual stage that, it’s hard to know where to start when picking an overdrive pedal. Which is why the TCElectronic MojoMojo Overdrive is such a refreshing take on a classic effect. All in all the MojoMojo is a true overdrive pedal in that it accurately replicates the sound of an overdriven amplifier and nothing more. Other overdrive pedals tend to add heavy distortion and color the sound thereby altering the overall tone of your setup. Not so with the MojoMojo. It offers a very straightforward effect while maintaining the tonal characteristics of your guitar and amplifier. That partnered with a compact design, intuitive interface and reasonable price and you have a great pedal to help achieve a thick, silky smooth overdrive.

The MojoMojo boasts a simple yet deep set of controls complete with:

Drive – Adjust the amount of overdrive in your signal
Bass – Adjusts the low frequency signal
Treble – Adjusts the high frequency signal
Level – Adjusts the volume of your overdrive effect
Voice Selector – Toggle between up position (true guitar signal) and down position (reduces low eq of your signal)

To summarize, this pedal is designed for players who are looking for the most straightforward gritty overdrive. It cannot reach heavily distorted or metal tones on it’s own. But if you’re looking for anything between an overdriven country twang like Brad Paisley and a heavy crunch like ACDC this pedal will be more than sufficient. Not to mention, the pedal can approach Marshall territory when partnered with an already overdriven amp. The most common application would be for solos: just click on your MojoMojo when it time to rip and then click off when it’s back to rhythm. Furthermore, a lot of the charm of this overdrive lies what it doesn’t do. In true TC Electronic fashion the pedal is true bypass so when not engaged there is no change to your signal. When it is engaged, one can easily set the level of the pedal to match their amplifier thereby allowing them beef up their signal without adding tons of volume. And, as stated before, the pedal accurately creates the sound of great tube amp overdriven instead of just adding a ton of gain. This can be very useful for dynamic players. Just like a real tube amplifier the drive starts to clean up when you roll down the volume of your guitar or pick lightly. Overall the MojoMojo is one of the more tasteful overdrives on the market. If you’re looking for a pedal that won’t destroy your guitar tone and instead that perfect amount of Mojo this pedal is definitely for you.

View the TC Electronic MojoMojo Overdrive on Amazon

Stringjoy Custom Guitar Strings Review

Stringjoy-custom-guitar-and-bass-stringsThere’s a new guitar string company on the market which is modernizing the way you purchase strings. Its quick and easy, feels like you are using an app, and gives you exactly what you want. The idea is simple, you can choose custom string gauges to get the exact tone for your guitar or bass.

The Importance of String Gauges

As most of your know, you can easily go to a music shop and pick up guitar strings in packs of different thicknesses. Choices are usually extra light, light, medium, and heavy. But the sets that are sold have pre-determined gauges. Thanks to Stringjoy, you can now have a completely custom set that after some experimentation, will be perfectly tailored to your specific guitar.

I personally own two upside down stratocasters in homage to Jimi Hendrix. After researching his string gauges, I was unable to find any string sets over the years that were the exact same. So after an order with Stringjoy, I was quite interested to hear the difference with the exact gauges. The verdict: string gauges made a huge difference, even with small variations! No longer did my D string feel too heavy, and now the sound was a whole lot more balanced. I will able to get more of a Hendrix vibe with this custom gauge set. My only complaint would be that it would be nice if Stringjoy could include different string materials such as pure nickel. However, they have told us they are planning on expanding their materials in the future.

Quality of Strings

So far, I haven’t had any of the strings break. They sound great, very clear tone and seem just as good as any of the top string companies on the market.

Cost

Costs are around $10 US dollars per set. If you live in USA, shipping is free. Canada and Mexico is $6 for shipping, and $10 for every other country. Not exactly very competitive, but not bad considering you get your own custom set. I would like to see some kind of discount in the future for repeat orders.

If you want to order a set, just visit stringjoy.com